Whatsapp: +86 18298157670 vicky@yczxairtankdcpump.com

news
How to Select the Right Vacuum Pad for Your Material Handling Application
A robotic arm swings down, the vacuum pad makes contact, and.vacuum pad .. nothing. The part slips. The line stops. The seconds tick by.
Every imperfect grip in an automated system costs you time, money, and throughput.vacuum pad A single dropped workpiece can scrap expensive parts, jam conveyors, or force an unscheduled line stop that ripples through your entire shift. The vacuum pad—small, simple, and often overlooked—sits at the center of that reliability equation.
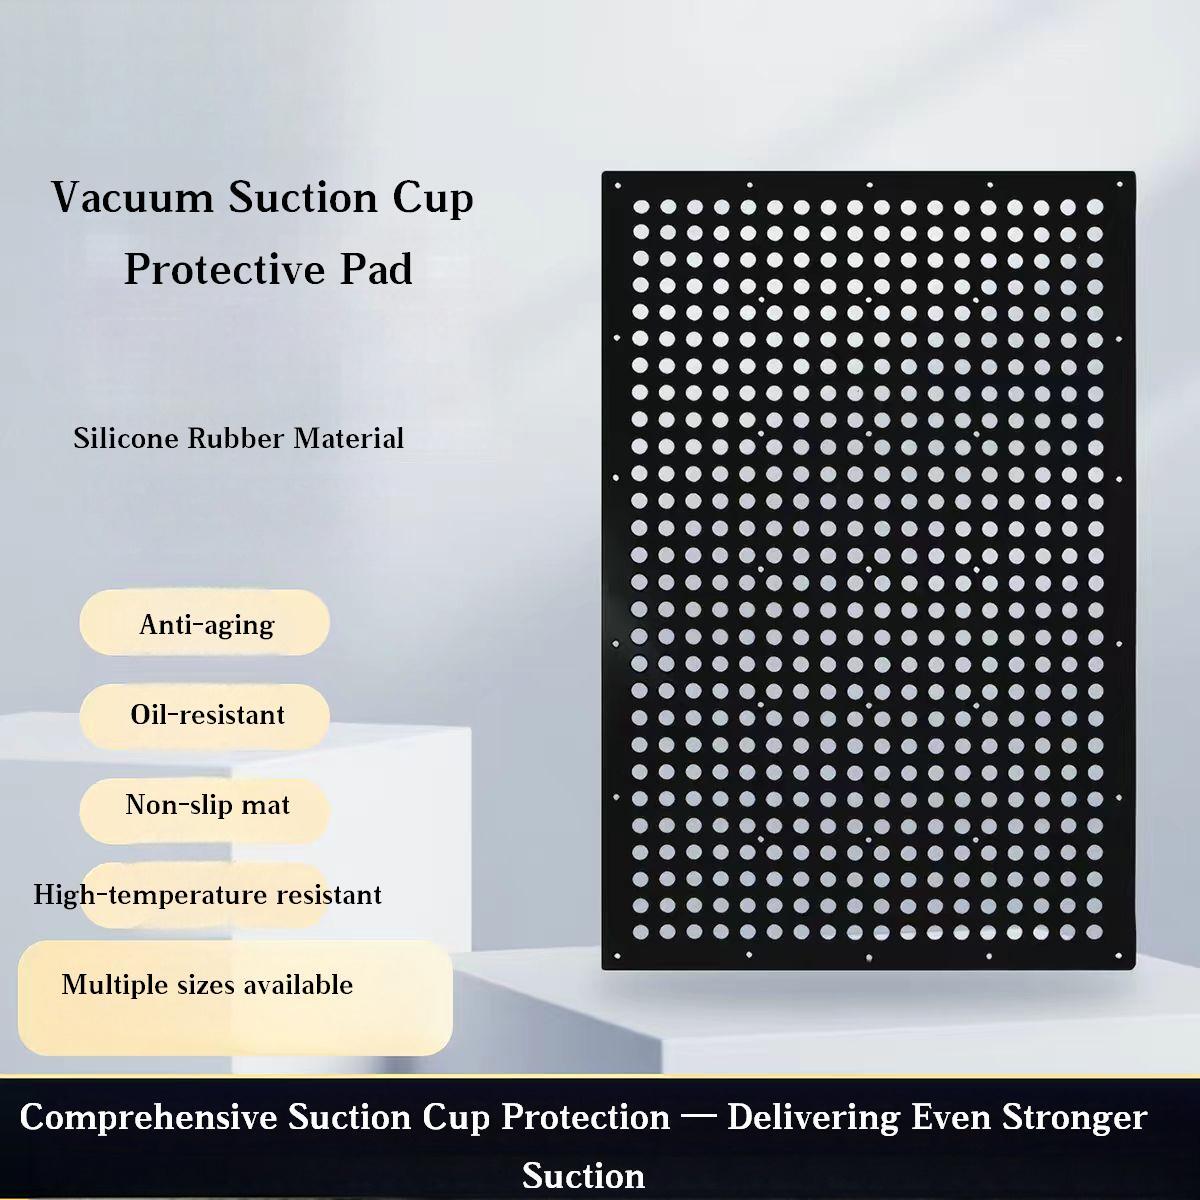
Choosing the right vacuum pad isn't about grabbing the first one that fits your fitting.vacuum pad It's about matching material, shape, size, and durometer to your exact application conditions. This guide walks you through a practical selection framework—from calculating required holding force to troubleshooting grip failures—so you can spec vacuum pads that hold firm on every cycle.
Key Takeaways
- Vacuum pad selection starts with three numbers: workpiece mass, acceleration, and your vacuum system's operating level—plug them into a holding force formula before choosing a diameter.vacuum pad
- Material choice (silicone, nitrile, polyurethane) directly determines temperature tolerance, oil resistance, and wear life—pick the wrong one and the pad fails fast.
- Surface texture drives shape selection: flat pads seal on smooth surfaces, bellows pads conform to curved or rough workpieces, and oval pads fit narrow edges.
- Weekly visual inspections and knowing the retirement criteria (lip wear, hardness change, cracking) prevent most field failures before they happen.
Why Vacuum Pads Matter in Modern Automation
Vacuum pads make modern manufacturing move.vacuum pad Packaging lines, automotive assembly, electronics handling, food processing—pick-and-place systems in every one of these industries depend on small, flexible pads to lift, move, and release workpieces thousands of times per day. When the pads work, nobody notices. When they don't, everyone notices.
The Role of Vacuum Pads in Pick-and-Place Systems
Think of a vacuum pad as the handshake between your automation and your product.vacuum pad The robot or actuator provides motion and positioning. The vacuum generator provides suction power. But the pad itself makes physical contact with the workpiece. If that contact isn't right, the entire system fails at the point of interaction.
A poorly matched pad might grip too aggressively and mar a delicate surface.vacuum pad It might seal poorly on a textured part and lose vacuum mid-transfer. Or it might wear out in a week because the material can't handle the ambient temperature or chemical exposure. In high-speed applications, even a 1% grip failure rate translates to hundreds of dropped parts per shift. I've seen packaging lines where pad-related stops ate 15-20 minutes per shift—not because the pads were defective, but because nobody had matched them to the actual operating conditions. The pads were right for the catalog spec and wrong for the real world.
How a Vacuum Pad Creates Reliable Grip
The principle is straightforward.vacuum pad A vacuum generator pulls air from the space between the pad and the workpiece, creating a pressure difference. Atmospheric pressure on the outside of the pad pushes the workpiece against the pad's sealing lip. The greater the pressure differential and the larger the pad's effective sealing area, the stronger the hold.
But here's what many selection guides skip: that seal depends on the pad's ability to conform to the workpiece surface.vacuum pad A hard, flat pad on a slightly textured surface leaves micro-gaps where air leaks in, reducing vacuum level. A soft, flexible pad on a smooth glass surface creates a perfect seal but might leave residue or wear out quickly. The physics is simple. The application details make it complex.
One more thing the physics textbooks don't emphasize enough: atmospheric pressure does the actual work.vacuum pad The vacuum generator doesn't "suck" the part up. It creates a pressure differential, and the surrounding atmosphere pushes the part against the pad. At sea level, that's about 14.7 psi (101 kPa). If your vacuum level is -60 kPa, you're using roughly 60% of that available atmospheric push. This is why vacuum pad manufacturers talk about "effective area" rather than just pad diameter—only the area inside the sealing lip contributes to holding force. A 50mm pad with a thick lip might only have a 40mm effective sealing diameter. Ignore that distinction and you'll undersize your pads.
Understanding Vacuum Pad Materials and Shapes
Before you calculate pad size, you need to narrow down what the pad is made of and what shape it takes.vacuum pad These two decisions eliminate most of the options in a catalog and get you close to the right pick.
Popular Materials: Silicone, Nitrile, Polyurethane, and More
Each vacuum pad material brings a specific set of strengths and trade-offs.vacuum pad Match the material to your environment, not your convenience.
Silicone handles temperature extremes better than almost anything else.vacuum pad It stays flexible from -60°F up to 400°F (-50°C to 200°C), making it the go-to for hot part handling and food-grade applications. Silicone also leaves no marks on delicate surfaces like glass or polished metal—it's the default choice for automotive glass handling for exactly this reason. The downside? It wears faster than other materials, absorbs oils, and can swell when exposed to certain chemicals. In a dirty environment, silicone acts like a lint roller, picking up dust and turning it into an abrasive paste that scratches your next workpiece.
Nitrile (NBR) delivers excellent wear resistance and works well on oily surfaces.vacuum pad If your workpieces arrive with a light coating of machining oil or release agent, nitrile maintains grip where silicone would slip. It handles temperatures from about 0°F to 230°F (-18°C to 110°C). Nitrile is cost-effective for general industrial use but can harden over time with ozone or UV exposure. I've seen nitrile pads near older electric motors develop a network of fine cracks within six months—classic ozone attack. The motors were generating enough ozone in normal operation to age the pads at 3-4x the expected rate.
Polyurethane (PU) offers the best abrasion resistance in the group.vacuum pad For applications handling rough surfaces like sanded wood, cardboard, or textured metal, polyurethane pads last far longer than silicone or nitrile. They resist cuts, tears, and wear. The trade-off is lower temperature tolerance (typically 30°F to 140°F or 0°C to 60°C) and less conformability on irregular surfaces. Don't spec polyurethane for curved parts unless you've tested the seal first.
Viton (FKM) and conductive materials fill specialty niches.vacuum pad Viton handles aggressive chemicals and high temperatures. Conductive pads dissipate static electricity for electronics handling. These cost more but solve specific problems that destroy general-purpose pads.
A common and costly error: spec'ing the softest pad available because "soft seals better.vacuum pad " Yes, low-durometer pads conform more easily. But they also wear faster, can extrude into workpiece holes or features, and may leave residue on heated parts. A 30-durometer silicone pad on a 150°F glass sheet can transfer microscopic amounts of material with every cycle. Over thousands of cycles, that residue builds up into visible marks. Start with the hardest pad that still seals reliably on your surface, then go softer only if testing shows you need it.
Flat vs. Bellows vs. Oval: Choosing the Right Shape
Pad shape isn't about aesthetics.vacuum pad It dictates how the pad contacts your workpiece.
Flat pads are the default choice for smooth, flat surfaces.vacuum pad Glass sheets, polished metal plates, plastic panels—anything with a clean, even surface. Flat pads deliver high holding force concentrated in a small area. They don't compensate for surface irregularities, so if the workpiece has texture, curvature, or height variation, the seal suffers.
Bellows pads feature accordion-like folds that compress on contact.vacuum pad This design absorbs height differences, conforms to curved or slightly irregular surfaces, and provides a cushioning effect during pickup. Bellows pads excel on items like bottles, curved automotive body panels, or textured plastic parts. The folds also give you extra stroke to break the seal during release. The flip side: bellows pads require more vacuum flow to evacuate the larger internal volume, and they can buckle under side loads. They also collapse predictably—usually about 1.5-2.5 times the fold height—and if your approach stroke exceeds the bellows' compression range, the pad bottoms out and stops conforming.
Oval or rectangular pads solve the problem of narrow gripping surfaces.vacuum pad When you need to lift a part by a thin edge or rib, a round pad wastes diameter in the wrong direction. An oval pad puts the sealing area where you need it—long and narrow. These appear frequently in electronics assembly and injection molding pick-and-place applications.
Another selection trap I see often: using bellows pads when flat pads would work fine.vacuum pad Bellows pads cost more, wear out faster (more flexing), and require more flow. They solve real problems—height variation, curved surfaces, fragile workpieces that need cushioning—but they're not "premium flat pads." If your surface is flat and your positioning is repeatable, a flat pad will outlast a bellows pad and cost less. Reserve bellows for the applications that actually need them.
Step-by-Step: How to Calculate the Right Vacuum Pad Size
Once you know your material and shape preferences, it's time to do the math.vacuum pad Guessing pad size leads to dropped parts or oversized, energy-wasting systems.
Determining the Required Holding Force
Start with your workpiece mass.vacuum pad Then account for everything that adds load beyond simple weight.
The core formula is:
Holding Force = Mass × (Gravity + Acceleration) × Safety Factor
If you're working in metric: take the mass in kilograms, multiply by (9.vacuum pad vacuum pad vacuum pad 81 m/s² + your system's acceleration in m/s²), then multiply by a safety factor. For imperial: use mass in pounds and acceleration in ft/s².
What acceleration should you plug in? Look at your robot or actuator specs.vacuum pad A high-speed pick-and-place might accelerate at 2-3 G's (19.6-29.4 m/s²). A slow gantry might run at 0.5 G. Be honest here—underestimating acceleration is the top reason pads lose grip mid-cycle.
Safety factors depend on your risk tolerance and operating conditions.vacuum pad Use 2x for horizontal transfers with smooth, non-porous workpieces. Use 4x or higher for vertical lifts, porous surfaces, or applications where a dropped part creates a safety hazard. In vacuum handling, safety factors aren't padding—they prevent accidents.
Let's run a real calculation so you can see how this works.vacuum pad Imagine you're picking a 3 kg aluminum plate from a CNC machine and placing it on an outfeed conveyor. The gantry accelerates at 12 m/s² during the transfer. The plate is smooth and dry, and you're lifting it horizontally (pad above the plate, lifting straight up). You're using two vacuum pads and your vacuum system pulls -65 kPa.
Required holding force = 3 kg × (9.vacuum pad 81 + 12) m/s² × 2 (safety factor for horizontal transfer) = 3 × 21.81 × 2 = 130.86 N total.
With two pads, each needs 65.vacuum pad 43 N of holding force. At -65 kPa vacuum, atmospheric pressure is doing about 65% of its maximum work. The required effective area per pad: 65.43 N ÷ 65,000 Pa × 1,000,000 (converting to mm²) ≈ 1,007 mm². That's an effective diameter of about 36 mm. Round up to a 40mm pad.
Now imagine the same plate, but the CNC left a light film of coolant.vacuum pad The plate is slightly slippery and you're accelerating laterally. Bump your safety factor to 3x: 3 × 21.81 × 3 = 196.29 N total, 98.15 N per pad. Required effective area per pad jumps to ~1,510 mm², pointing to a 45mm pad. Same workpiece, same move—the surface condition just drove a pad size increase.
Accounting for Acceleration, Orientation, and Safety Factors
A part held vertically (pad face parallel to the floor, part hanging below) experiences shear load on the pad lip.vacuum pad The friction between pad and workpiece now carries the load, not just the direct vacuum force. You need extra holding capacity to maintain that friction.
A part held horizontally with side acceleration (the pad moves sideways) also needs friction to prevent the workpiece from sliding off.vacuum pad In both cases, increase your effective holding force requirement by 25-50% above the pure lifting calculation.
Now divide your required holding force by the number of vacuum pads in your system and by your vacuum generator's operating pressure.vacuum pad This gives you the minimum effective pad area. Round up to the next standard pad diameter. Always round up.
Watch out for this mistake: using the pad's advertised diameter as the effective sealing diameter.vacuum pad That 50mm pad in the catalog? Its sealing lip might only create a 42mm effective area. The manufacturer's datasheet will list the effective diameter or effective area—use that number, not the nominal size. If the datasheet doesn't list it, call the manufacturer. A 50mm pad with an effective diameter of 42mm has about 30% less holding area than a full 50mm circle. That's a dropped-part incident waiting to happen.
Example: A 5 kg workpiece, accelerated at 15 m/s², held vertically with a 4x safety factor needs (5 × (9.vacuum pad 81 + 15) × 4) = 496 N of total holding force. With four pads and a vacuum level of -60 kPa, each pad must provide at least 124 N, requiring an effective area of roughly 20.7 cm². That points to a pad around 50-55 mm in effective diameter.
Matching the Vacuum Pad to Your Workpiece Surface
You've calculated the pad size.vacuum pad Now check whether the surface you're gripping will actually let that pad seal.
Working with Smooth, Rough, Porous, or Oily Surfaces
Smooth, non-porous surfaces (glass, polished metal, sealed plastic) are the easiest to grip.vacuum pad Flat pads work perfectly. Low-durometer (soft) materials conform well and resist leaking. You can usually run smaller pads and lower vacuum levels.
Rough or textured surfaces (sand-cast metal, raw lumber, textured plastic) create leak paths between the pad lip and the workpiece.vacuum pad Air constantly flows in, reducing vacuum level. Bellows pads with soft lips adapt better to texture than flat pads. You may need to oversize the pad and the vacuum generator's flow capacity to compensate for continuous leakage.
Porous surfaces (cardboard, foam, unsealed wood, fabric) leak air through the workpiece itself.vacuum pad You need high-flow vacuum generators and enough pad area to overcome the constant loss. Flat pads often work better here because they minimize the internal volume the vacuum system must evacuate.
Oily or greasy surfaces demand nitrile or polyurethane pads.vacuum pad Silicone absorbs oil and swells, losing its sealing ability. A harder durometer pad also squeezes oil out of the contact zone rather than skating on top of it.
Let me give you a real situation where surface conditions drove the entire selection.vacuum pad A semiconductor equipment manufacturer was picking ceramic substrates with a slightly powdery surface from a lapping process. They started with 25mm flat silicone pads and lost grip on roughly 3% of cycles. The powder acted as a leak path—the pad lip sealed against the powder, not the substrate, and the powder layer shifted under vacuum. The fix: 30mm bellows pads in nitrile, with enough compliance to compress through the powder layer and seal against the substrate underneath. The bellows also provided a gentle touch that didn't crack the fragile ceramic. Pad cost went up 40%, scrap cost went to zero.
How Environmental Conditions Affect Pad Selection
Your shop floor conditions can override every other selection criterion.vacuum pad High ambient temperatures near ovens or casting stations may eliminate polyurethane pads entirely and push you toward silicone or Viton. Chemical splash from washdown stations or cutting fluids eats certain materials quickly—check chemical compatibility charts for your specific exposure.
Outdoor or high-ozone environments (near electric motors, welding stations) accelerate nitrile hardening.vacuum pad Dusty environments embed particles in soft silicone pads, turning them into sandpaper that scratches workpieces. Each condition narrows your viable choices. List your environmental constraints before you shop, not after the first pad failure.
Here's an environmental gotcha I've seen multiple times: shop air temperature versus workpiece temperature.vacuum pad The pad spec sheet says the material handles 200°F, so you think you're fine. But the workpiece coming out of the drying oven is 180°F, and during an 8-second cycle the pad never cools down between picks. The pad body temperature climbs over the shift and eventually exceeds the material's continuous-use rating. The pad doesn't fail suddenly—it just wears out in two weeks instead of two months. If your workpiece is hot, the pad needs to handle that temperature continuously, not just intermittently.
Common Vacuum Pad Problems and How to Troubleshoot Them
Even well-specified pads develop problems.vacuum pad Spotting the root cause quickly keeps your line running.
Loss of Grip and Part Slippage
When a pad that worked fine suddenly starts dropping parts, check these in order:
Vacuum level at the pad.vacuum pad vacuum pad A cracked hose, loose fitting, or clogged filter reduces suction before it ever reaches the pad. Measure vacuum at the pad, not at the pump. If the level dropped, look for leaks in the plumbing or a failing vacuum generator.
Pad alignment.vacuum pad A pad that hits the workpiece at an angle folds the lip unevenly and creates a leak path. Check that the pad contacts the workpiece surface squarely. Misalignment often develops slowly as mounting brackets loosen or workpieces shift in fixtures.
Lip wear or damage.vacuum pad Run your finger along the sealing lip. Cuts, tears, or a permanently flattened lip prevent sealing. If the wear is concentrated on one side, you have an alignment problem. If it's uniform around the circumference, the pad has reached its service life.
Surface contamination.vacuum pad Dust, oil, or residue on the workpiece or pad lip acts like a gasket leak point. A quick wipe test—clean both surfaces and retry—tells you if dirt was the culprit.
One error I see even experienced technicians make: replacing the pad without diagnosing why it failed.vacuum pad A pad with one-sided lip wear didn't just get old—something is forcing it into angular contact. A pad with a perfectly clean center surrounded by a ring of wear was over-compressed, not worn out. If you don't fix the root cause (bracket alignment, approach force, vacuum level), the replacement pad will fail the same way, just on a different shift.
Uneven Wear, Cracking, and Deformation
Uneven wear patterns are diagnostic.vacuum pad One-sided wear means off-angle contact or side loading during transfer. Center-only wear suggests the pad is too small and stretching to grip. Outer-edge wear with a pristine center means over-compression, often from excessive pad downward force.
Picture this scene on a real shop floor: You're called to an assembly cell where pads are lasting a week instead of the expected six.vacuum pad The worn-out pads have deep grooves across the face. You trace the problem back to the incoming parts—the stamping supplier changed their die lubricant three weeks ago, and the new formulation is slightly more abrasive. The pads are wiping across the part surface during the last millimeter of approach, and that abrasive film is acting like lapping compound. The fix: adjust the approach path so the pad descends vertically into contact rather than sliding laterally. The pad material never changed. The pad life tripled.
Cracking and hardening come from environmental damage.vacuum pad Ozone cracking creates small, parallel cracks across the pad surface—common in nitrile pads used near electric motors. Thermal hardening turns flexible materials brittle. If pads crack after a few hundred cycles, you're outside the material's temperature range.
Permanent deformation (the pad stays compressed even when removed from the workpiece) indicates over-compression or chemical attack.vacuum pad Reduce the approach force, or switch to a material that resists your process chemicals.
Best Practices for Long-Lasting Vacuum Pad Performance
A pad that gets inspected lasts longer than one that gets ignored.vacuum pad Simple routines catch problems before they stop production.
Inspection and Cleaning Routines
Pull visual checks weekly.vacuum pad Look for lip wear, cracks, cuts, changes in shape, or discoloration. A pad that started clear and turned yellow has experienced thermal or chemical stress. One that started soft and feels hard has aged past its useful flexibility.
Make this a 60-second routine, not a project.vacuum pad At the start of every shift, grab the pad at the station closest to the oven, or the one handling the dirtiest parts—that's your canary. If that pad looks good, the rest probably are too. If it's showing early wear, you caught the problem before it became a line stop. I've seen maintenance teams turn this into a checklist item so simple that operators do it on autopilot: look at the lip, flex the pad once to check for cracks, wipe it with a clean rag, done.
Clean pads with the solvent recommended for their material. Mild soap and water works for most light contamination. Avoid aggressive solvents on silicone (they swell the material). For nitrile, avoid acetone and MEK (they dissolve the surface). When in doubt, check the manufacturer's cleaning guidance for your specific pad material.
Store spare pads in sealed bags away from direct sunlight, ozone sources, and temperature extremes. UV exposure ages most elastomers. A box of pads left on a sunny windowsill may be half-dead before you install the first one.
When to Replace vs. When to Recondition
Replace the pad when the sealing lip shows visible wear exceeding 25-30% of its original thickness, or when hardness testing shows a change of more than 5 points on the Shore A scale from the original specification. Cracks deeper than 1 mm compromise seal integrity and demand immediate replacement.
Some pads can be reconditioned by trimming the lip if the design allows it, but this reduces pad diameter and effective area. Recalculate your holding force before going this route. In most cases, replacement costs far less than the downtime from a marginal pad.
Think about this economically, not sentimentally. A vacuum pad costs $5-50. The 20-minute line stop to replace it unexpectedly costs $500-5,000 depending on your operation. A carrier that drops a machined casting onto a conveyor hard enough to dent a sealing surface might scrap a $200 part. The math is brutally simple. I've talked to plant managers who track "cost per grip" and find that running pads to failure costs 3-5x more in downtime and scrap than replacing them at 80% of expected life. The pad isn't the expensive part. The dropped part is.
Building a preventive replacement schedule based on cycle counts eliminates guesswork. Track how many cycles you get before pads start showing wear, then replace them at 80% of that number. The cost of scheduled pad changes is predictable. The cost of unscheduled line stops is not.
The vacuum pad you choose today determines how many parts you drop tomorrow. Run through the selection framework: calculate holding force, match material to your environment, pick a shape that seals on your surface, and inspect regularly. Get those things right, and pick-and-place systems run quietly, reliably, and profitably.
Download our free Vacuum Pad Selection Checklist to quickly match the right pad to your application—with a printable worksheet for holding force calculations, material compatibility tables, and a troubleshooting reference you can post at your line.
Frequently Asked Questions
1. How do I calculate the right vacuum pad size for my pick-and-place application? Use the formula: Holding Force = Mass × (Gravity + Robot Acceleration) × Safety Factor. Divide the total holding force by the number of pads and your vacuum level to find the minimum effective area per pad, then round up to the next standard diameter. Always use the effective sealing area from the manufacturer's datasheet, not the nominal pad diameter.
2. Why does my vacuum pad keep dropping parts during the transfer? Common causes include a drop in vacuum level at the pad due to leaks or clogged filters, pad misalignment hitting the workpiece at an angle, a worn or torn sealing lip, or surface contamination like oil or dust on the pad or workpiece. Check each of these in order to pinpoint the failure.
3. What is the difference between silicone and nitrile vacuum pads? Silicone performs across a wide temperature range (-60°F to 400°F), leaves no marks on delicate surfaces, and is common in food-grade and hot-part handling, but it absorbs oils and wears faster. Nitrile offers excellent oil resistance and longer wear life on oily workpieces up to about 230°F, but can crack from ozone or UV exposure.
4. When should I replace a worn vacuum pad instead of trying to clean or recondition it? Replace the pad when the sealing lip wears down by more than 25-30% of its original thickness, hardness changes by more than 5 Shore A points, or cracks deeper than 1 mm form. Scheduled replacement at around 80% of expected cycle life often costs far less than unscheduled downtime from a grip failure.
5. Can I use a flat vacuum pad on rough or textured surfaces? Flat pads are designed for smooth, non-porous surfaces. For rough or textured workpieces, a bellows-style pad with a soft lip conforms better to surface irregularities, reduces leakage, and maintains a stronger seal. Using a flat pad on a rough surface often leads to poor grip and dropped parts.
Tags:diaphragm vacuum pump | dry vacuum pump | dual-stage vacuum pump
0users like this.